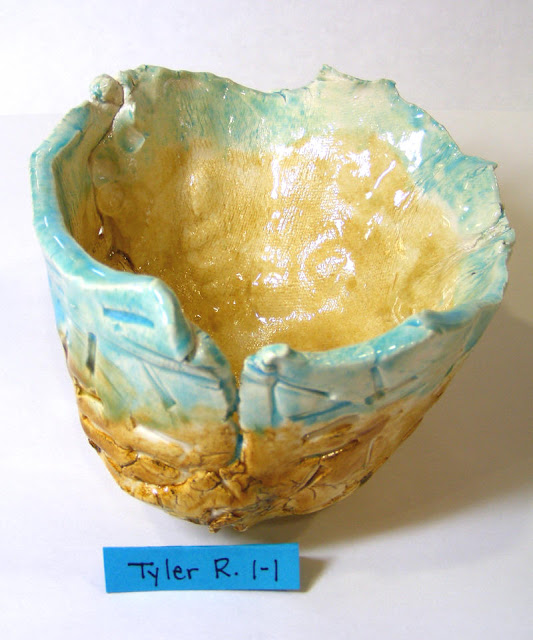

In first grade at Suffield, we just completed a unit all about texture and the ceramic process. Whenever I do clay projects with a grade level, I always run another project at the same time. This allows for enough drying and firing time without being super rushed. I have recently started trying to have the two projects support one another and it's really been working out great.
For the bowls, we put fabric swatches over our knees (to keep our pants cleaner!) and then formed a pre-rolled slab of clay around our knees. We then attached coils (I found that it is much easier to have the kids roll the coils BEFORE starting their knee bowls.) to the part of the clay that was on top of our knee caps to create feet for the bowls. Then the students used clay tools to create texture on the outsides of their bowls.
I set up glazing centers and we spent a day glazing after the bowls were bisqued. I usually put a coat of clear glaze on younger grade levels' ceramic work because they usually just don't quite get enough even glaze on their work to really shine. With these, I also clear glazed the bottoms and stilted them in the kiln so that they could more easily become a functional bowl. I know they don't seem terribly functional, but the kids were EXTREMELY excited about trying to eat something out of their bowls!
On the class times that we weren't working on the bowls, we worked on our texture paintings. They started with crayon rubbings with textures plates, and then the kids painted liquid watercolors over them to create resists. I ordered some metallic liquid watercolors this year and I absolutely love them and the kids liked them too. The kids then glued their paintings to larger construction paper and made AB patterns with construction paper collage. We added yarn to the borders of the paintings to add even more texture to complete them. The kids really enjoyed this unit and I will for sure do it again!


2 comments:
Thanks so much for posting detailed photos and instructions of the bowl-making process. Your kids obviously LOVED it and they turned out great. Thanks for posting.
Fabulous idea. I wonder if I could do this with other materials that don't need to be fired...
Post a Comment